Show Posts

This section allows you to view all posts made by this member. Note that you can only see posts made in areas you currently have access to.


Messages - ssshashini

Pages: 1 ... 36 37 [38]
556
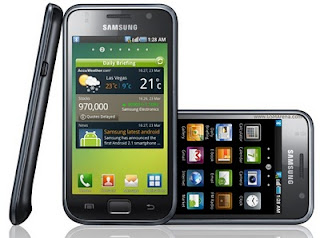
Samsung Programs & Flashers / Samsung I9001 hard reset
« on: March 27, 2012, 10:37:43 PM »


Note: Please back up all of your personal data before you proceed. All  data will be deleted on your Samsung I9000 Galaxy S by doing this  procedure. However, this process will NOT delete data stored on the  microSD memory card.


To Hard Reset Samsung I9000 Galaxy S
1. Turn the power off. If your Samsung Galaxy S is frozen, pull the battery out and reinsert it
2. Hold the Volume Down button
3. Press and release the Power button
4. You are now presented with a menu that allows for Fastbook, Recovery, Clear Storage, and Simlock
5. Select Clear Storage by pressing the Volume Down button
6. Press and release the Power button
7. Now simply confirm your decision: Volume Up for YES and Volume Down for NO

If YES is selected, all data including third-party applications will be  deleted from your Samsung I9000 Galaxy S. Once the wipe is complete, the  phone will reboot to its factory fresh state.

557
Nokia Hardware Section / Nokia n8 touch screen
« on: March 27, 2012, 10:33:29 PM »
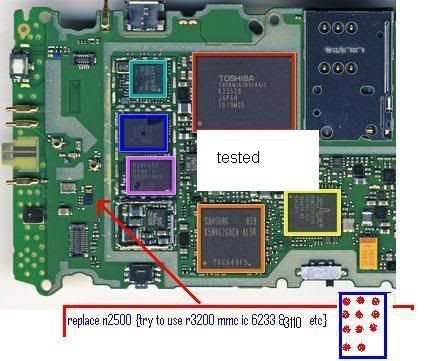
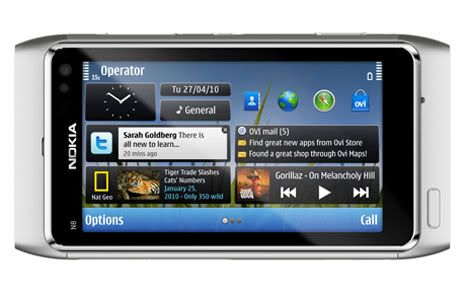
Nokia N8 touch screen not working tested solution


558
Nokia Hardware Section / Nokia n700 hands free solution
« on: March 16, 2012, 10:39:52 PM »
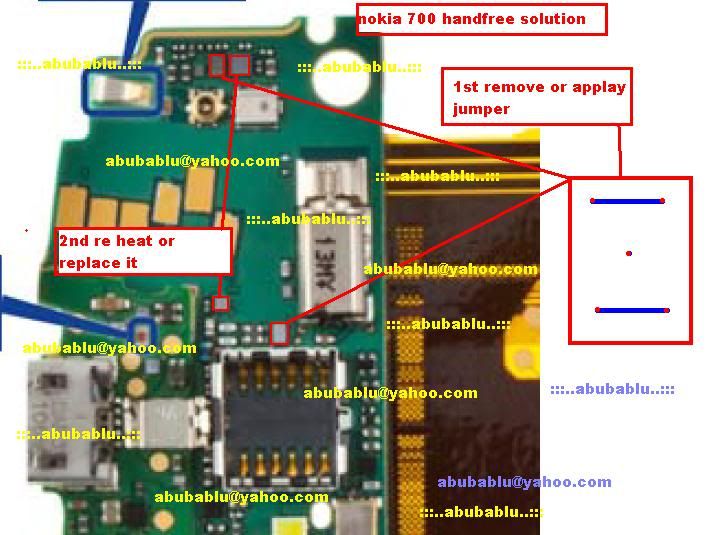
handfree


559
Apple IPhone software / jaibreak for ios 5.1
« on: March 15, 2012, 02:41:27 PM »
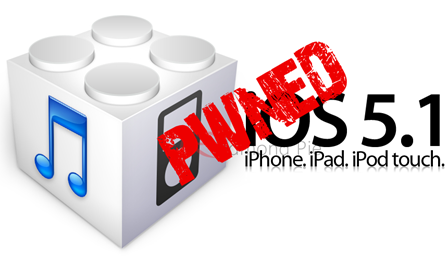
The iPhone Dev-Team – reliably as per usual – have updated its Redsn0w jailbreak tool, allowing those using the latest iOS 5.1 to set their devices free. It works for all iPhone, iPad and iPod touch devices except, of course, the iPhone 4S and the iPad 2.
Additionally, as you may already be aware, the jailbreak is tethered, meaning you will need to connect your device to a computer to boot tethered each time it is switched off for whatever reason. The ‘SemiTether’ patch eases the tethered scenario by allowing devices to boot without connecting to a PC or Mac, although features are extremely limited, thus it will have to be booted tethered in order to function at optimum level once more.

Of course, it’s not as exciting as the fully-untethered jailbreak with all the bells and whistles; but we reckon that it’s better than no jailbreak at all!
As usual, we’ve got the tutorial to help you in your quest to jailbreak your iOS 5.1 device.
NOTE:
  • As already mentioned, this jailbreak does not work on the iPad 2 or iPhone 4S.
  • If you unlock with GEVEY or Ultrasn0w, DO NOT update to the stock iOS 5.1 firmware. Skip to the latter part of this guide for more info.
  • You will be booting tethered quite a bit, so if you don’t think you can deal with constantly connecting and rebooting, wait for an untethered or downgrade to iOS 5.0.1/4.x.
With the formalities complete, let’s start the show!
How to jailbreak iOS 5.1 using Redsn0w
Step 1: Download the latest version of iTunes (10.6)
Step 2: Open up iTunes, and back up your device.
Step 3: Upgrade your firmware to iOS 5.1. [download links]
Step 4: Download the latest version of Redsn0w (Windows/Mac)
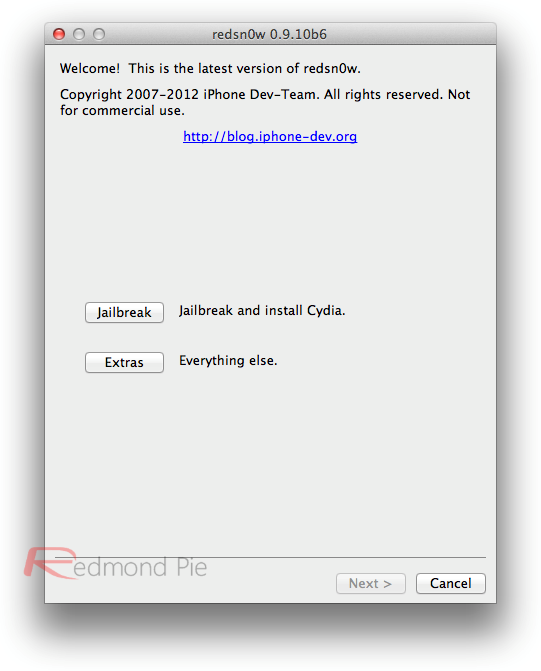
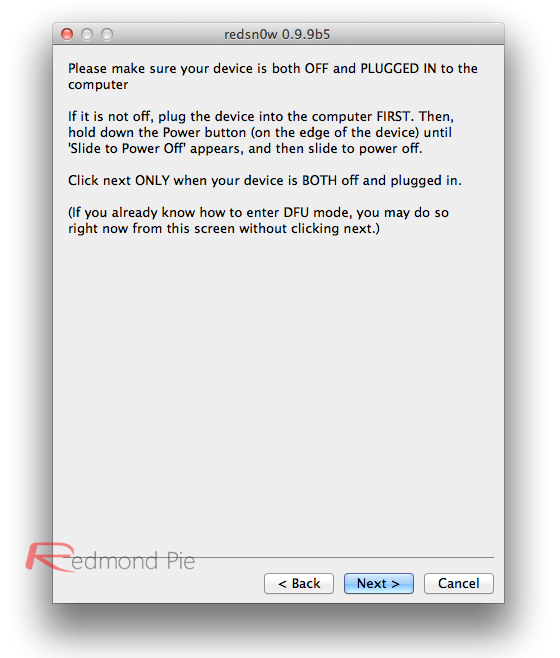
Step 5: Start Redsn0w, select "Jailbreak" then "Install Cydia". Follow the steps to place your device into DFU mode.


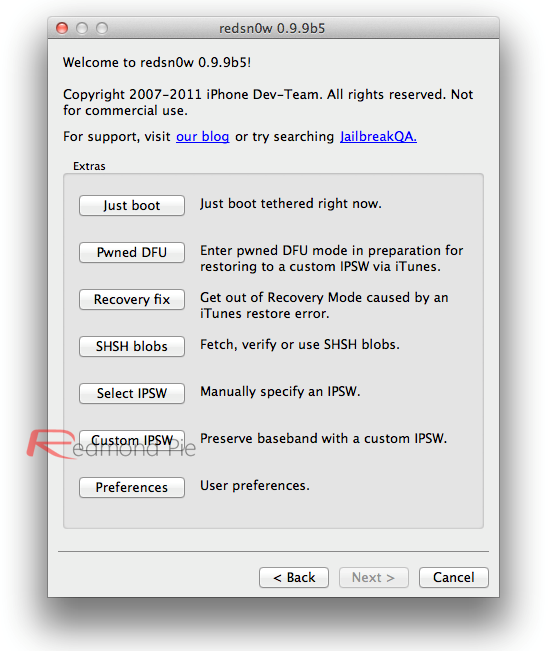
Step 6: Now we move on to the process where you will need to repeat every time your device is switched off. This is called tethered boot. Launch Redsn0w, select "Extras", then"Just Boot" in order to boot your device tethered.

Booting Semi-Tethered (Optional)
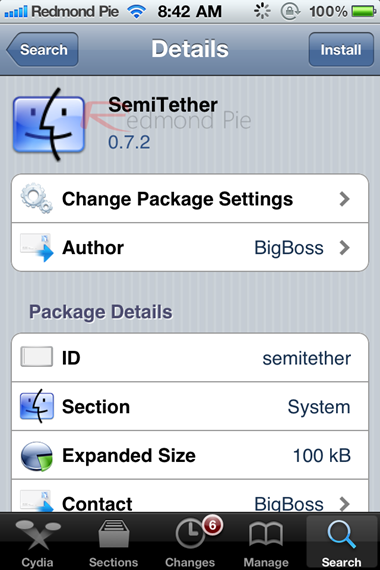
The "SemiTether" patch may work through to 5.1. It’s a cross between tethered and untethered – allowing you to boot your device without a computer, but the available features are somewhat limited, so you’ll need to boot tethered through Redsn0w in order to enjoy a  fully-functional break. It’s free, and available over at the BigBoss repo: http://thebigboss.org/semitether.

Note To Unlockers:

If you use the GEVEY SIM interposer or Ultrasn0w to unlock your iPhone, you will need to create a custom .iPSW, in order to preserve your baseband.

In Redsn0w, select "Extras", then "Custom IPSW", locate your iOS 5.1 file, and let Redsn0w work its magic.

Then enter pwned DFU mode (Extras > Pwned DFU) and restore to your custom firmware via iTunes. After that, you’ll be able to unlock with GEVEY, Ultrasn0w fixer, or Ultrasn0w (when it is available).

Full video tutorial is embedded below:

[ame=http://www.youtube.com/watch?v=GjVDoAWdCz8]iOS 5.1 TETHERED Jailbreak for iPhone 4, iPhone 3GS - Redsn0w 0.9.10b6 (Windows/Mac)      - YouTube[/ame]

560
Apple iphone disassembly pictures / iPhone 4S disassembly
« on: March 15, 2012, 12:50:08 PM »


561
Samsung / C3303k pa jumber
« on: March 15, 2012, 09:12:25 AM »
Samsung c3303k pa jumber for network


done


Sent from my iPhone using Tapatalk

562
Apple inc. products news / IOS 5.1 released
« on: March 08, 2012, 05:48:24 AM »


Today is definitely an exciting day, as the new iPad 3 was unveiled, along with a refreshed Apple TV. Other than that, however, there have been a number of other exciting things happening with the Cupertino company.

iOS 5.1, Japenese Siri, and iPhoto have all been made available today. Apple will even launch a new iTunes later today, bringing it up to version 10.6.

We’ll keep you posted and will let you know when it’s made available. Stay tuned!


---
Sent from my iPhone using Tapatalk

563
Apple IOS / ipad2 4.3.3 jailbreak
« on: February 16, 2012, 02:03:05 PM »
ipad2 4.3.3 jailbreak with the help of jailbreakme here is the screenshot and videos
 
iPad 2 Jailbreak released finally. Comex has just released his userland jailbreak JailbreakMe 3.0 to jailbreak iPad 2 on iOS 4.3.3 untethered. JailbreakMe doesn't support iOS 5 jailbreak for iPad 2 so far. iOS 4.3.2 / 4.3.1 / 4.3 will be supported soon.


JailbreakMe 3.0 supported devices so far :

  • iPad 1: 4.3 to 4.3.3
  • iPad 2: 4.3.3
  • iPhone 3GS: 4.3 to 4.3.3
  • iPhone 4: 4.3 to 4.3.3
  • iPhone 4 CDMA: 4.2.6 to 4.2.8
  • iPod touch 3g: 4.3, 4.3.2, 4.3.3
  • iPod touch 4g: 4.3 to 4.3.3

JailbreakMe 3.0 Q & A from dev-team blog:
   Q: Do the holes discovered by @comex put my device at risk?
A: Yes. We recommend installing “PDF Patcher 2” in Cydia once you’re jailbroken to eliminate this risk (any firmware version).
 
Q: How does jbme3.0 differ from the existing jailbreaks?
A: jbme3.0 is entirely userland-based, from start to finish. The A5 chip in the iPad2 has no iBoot or bootrom-level exploits yet, so tools like redsn0w, PwnageTool and sn0wbreeze can’t use the limera1n bootrom exploit to inject the jailbreak. Even for those devices where limera1n works, jbme3.0 injects the jailbreak with a userland exploit.
 
Q: If I’m already jailbroken on the latest firmware, is there any advantage to jailbreaking again?
A: No, but you should consider showing this to your friends! Spread the jailbreaking fever.
 
Q: Are the holes exploited by jbme3.0 closed in iOS5?
A: The holes still exist in the iOS5 betas, but they’ll almost certainly be fixed by the time iOS5 is public. However because the iPad2 had no public jailbreak yet, it probably wasn’t worth waiting until the fall to use them. If history repeats itself though, there will be more holes and exploits.
 
Q: Will I permanently lose the jailbreak if I need to restore my device?
A: For all except the iPad2, saving your SHSH blobs should let you always restore your device to iOS versions where this jailbreak works. The iPad2 is a little more complicated. If you have a wifi-only iPad2 and saved SHSH blobs, you’re in good shape. But if you have the GSM or CDMA iPad2, you won’t be able to restore to 4.3.3 or lower once Apple stops signing its baseband. There are a few ideas that might work to get around this limitation, but for now it’s best to assume there’s no going back to 4.3.3 once 4.3.4 is out for iPad2 GSM or CDMA owners.
 
Q: I heard this new unionfs stuff is dangerous?
A: Define dangerous :) Seriously though, although unionfs is a huge improvement to the install time of the jailbreak, it is brand new code and there is the possibility something will go wrong. Just keep regular backups of your media and content and you should be fine. If there are any problems, they should appear within the first few days, so hold off and let “everyone else” test the waters if you’d like.
iPad 2 Jailbreak iOS 4.3.3 Guide
 
iPad 2 jailbreak with jailbreakMe is very easy. To Jailbreak iPad 2, there's no need to connect your iPad 2 with iTunes as iPad 2 jailbreak can be done directly form your Safari via internet.


Step 1 :
You have to upgrade to any jailbreakable firmware shown above.

iOS Downloader - Click Here
.


Step 2:
Just navigate your Safari Browser to

http://jailbreakme.com
and hit the "Free" button


[/COLOR]


Step 3:
You will have a jailbroken iPad 2 after minutes of some processes. Enjoy ;)


Jailbreak iPad 2 with JailbreakMe in Video :

[ame=http://www.youtube.com/watch?v=C0djYRtNW98]How To Jailbreak iPad 2 / iOS 4.3.3 With JailbreakMe 3.0 - iPhone 4, 3GS, iPod Touch 4G      - YouTube[/ame]


[/COLOR]
564
Nokia Software Section / N900 flashing guide
« on: February 14, 2012, 08:02:56 PM »
Before we start, please note that this would be done using the command line interface, it may seem tricky but let me assure you that it is simply enough for anyone to accomplish.
  • Download and install the latest version of Maemo Flasher (e.g. maemo_flasher-3.5_2.5.2.2.exe). Since this is a command line application you will see no shortcut on the desktop or in the Program Files option under the Start menu.
  • Next, Download the latest firmware (.bin) file, it will look like “RX-51_xxxxx_ARM.bin”. You will need your IMEI  number to access the downloads, it can be found on the box or by going to Settings > General >About Product.
  • Also download the Vanilla eMMC image (.bin file) from the same page. It will look like “RX-51_2009SE_1.2009.41-1.VANILLA_PR_EMMC_MR0_ARM.bin”
  • Save both  to C:\ProgramFiles\maemo\flasher-3.5\. My suggestion is to rename them to something simple such as RX-51.bin for the firmware and R.bin for the eMMC, this will make typing the commands easier later on.
  • Make sure that the battery is fully charged and switch off the device.
  • Open the Command Prompt by going to Start then Run and type cmd, then press Enter.
  • Change directory to the flasher’s program path by entering:
   cd "C:\ProgramFiles\maemo\flasher-3.5"
  • Connect the USB cable while holding the ‘u’ key on the N900. Within an instant you will see a USB icon on the top right corner of the N900. Now leave the ‘u’ key.
  • Run the following command:
   flasher-3.5.exe -F RX-51.bin -f -R
  • I typed RX-51.bin because I had renamed the file earlier, otherwise it would have been: (this was the name of the latest firmware, the name may vary after a new firmware comes out)
   flasher-3.5.exe -F RX-51_2009SE_2.2009.51-1_PR_COMBINED_MR0_ARM.bin -f -R"
  • You will see text similar to the one below on your PC.
  • The update will take about 3 minutes after which the N900 will reboot and display the Welcome screen with Regional settings.
The next step is to flash the Mass Storage or the eMMC. The first few steps are identical to the way you would flash the firmware. If you are following on from the above and already have the command prompt open, you can directly proceed to step number 3.
  • Open the Command Prompt by going to Start then Run and type cmd, then press Enter.
  • Change directory to the flasher’s program path by entering:
   cd "C:\ProgramFiles\maemo\flasher-3.5"
  • Connect the USB cable while holding the ‘u’ key on the N900. Within an instant you will see a USB icon on the top right corner of the N900. Now leave the ‘u’ key.
  • Execute the following command:
   flasher-3.5.exe -F R.bin -f -R"
  • I typed R.bin because I had renamed the file earlier, otherwise it would have been
flasher-3.5.exe -F RX-51_2009SE_1.2009.41-1.VANILLA_PR_EMMC_MR0_ARM.bin -f -R
  • You will see text similar to the one below on your PC.
   
  • The flash will take around 1 minute after which the device will reboot.
  • The bright Nokia screen will come up on the screen with the USB icon on the top right followed by progression dots with yellow LED blinking for a few seconds. The device will then turn off and go into charging mode with the yellow LED blinking (NOTE: If the device appears to reboot, unplug the cable.)
  • Unplug cable and wait for device to turn off completely. You may hear a sound (punk) of the device turning off.
That’s it. You have now hard reset the N900 to the factory state. This procedure can be used to update the firmware on your device as well, if you wish you can leave formatting the eMMC if your intention is only to update the firmware. Please make sure that the battery on your N900 is completely charged, otherwise you might brick it.
This guide has been adapted from this immensely useful wiki on maemo.org.
Disclaimer: Please do this at your own risk.

Pages: 1 ... 36 37 [38]
SimplePortal 2.3.7 © 2008-2025, SimplePortal